Machine Vision
Development Kit
Industrial vision system Applications

Scope of Technology
The global machine vision market was valued at $7.85 billion in 2020. It is expected to grow by 7.8% during the 2021-2028 period from USD 8.39 billion in 2021 to USD 14.18 billion in 2028.
Fortune Business InsightsTM, in its report “Machine Vision Market 2021-2028,” provides this information.
The machine vision market is expected to grow at a faster rate due to the need for quality inspection and automation inside factories, the growing demand for AI and IoT integrated systems based on machine vision, and the adoption of Industrial 4.0 technology, which uses vision to increase robotic automation’s productivity.
A complex, unstructured scene that is interpreted qualitatively is best handled by human vision, while a structured scene that is interpreted quantitatively is best handled by machine vision due to its speed, accuracy, and repeatability. A machine vision system can examine hundreds or thousands of elements per minute on a production line. A machine vision system designed around the right camera resolution and optics can simply inspect object details too small to be seen by the human eye.
Machine vision reduces the amount of physical contact between a test system and the parts being tested, preventing part damage and reducing maintenance and operating costs related to mechanical component wear and tear. It protects workers from hazardous environments and prevents human contamination of clean rooms.
Scope of Learning

Machine Vision, which is also known as industrial image processing, is an important tool for optimizing and automatic monitoring of production processes; in this context, industrial “machine vision” cameras play an important role.
The industry is segmented into the semiconductor, medical, automotive, manufacturing, and other (retail, banking, etc.). High voltage systems installed in the automotive sector are widely used for inspection functions such as assembly verification, error correction, presence/absence verification and final verification. In the automotive industry, these high-voltage systems are also used for robot control, test automation, and dimensional measurement.
Deep Learning/Artificial Intelligence (AI)
When applied to industrial machine vision, deep learning enables robots and machines to learn by example, something humans do naturally. The latest ASPAGTEQ® machine vision solutions use multi-layered “bio-inspired” deep neural networks to simulate human brain activity in learning a task, allowing vision systems to recognise images, discern trends, and grasp small changes in images that signify flaws.
Presence Verification Vision Systems
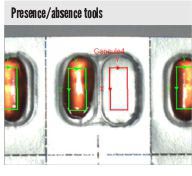
Presence inspection vision solutions by ASPAGTEQ® are used on automatic production lines for quality control because of redoubled works automation, industrial vision systems and image process technologies are actively introduced into industrial automation over the previous few years. Here, we have a tendency to describe the benefits of mistreatment vision systems and machine vision for presence verification inspection, combined with the essential principle and sensible applications of presence inspection using image processing.
The Technology Behind Verification Checking
- Threshold-based analysis
- Pattern-based “target” verification using a master template
- Contour-based verification
- Colour image processing
- AI deep learning algorithms
Gauging Using Machine Vision
 |
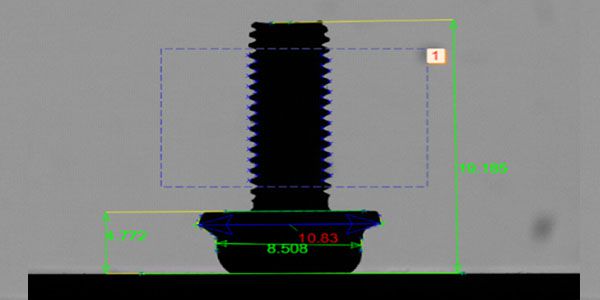 |
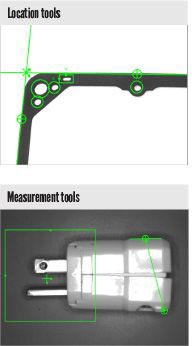
Machine vision measuring is used to autonomously confirm the dimensional accuracy of components, parts, and sub-assemblies without the need for operator intervention. Machine vision has the advantage of being non-contact, which means it does not contaminate or damage the part being inspected.
Aspagteq machine vision systems can also measure object features down to the micron level, providing a non-conventional solution.
- Measuring maximum/minimum dimensions of components, parts or products
- Measuring inner or outer diameters or centre coordinates of circular products
- Gauging injection moulded parts for key dimensions
- Dimensional inspection of medical device components and pharmaceuticals
- Measuring label positions, seals and packaging dimensions
- Measuring widths, cut-outs, overlays and print of sheet/film products
- Verifying critical dimensions on automotive, battery and electric vehicle parts
- Gauging components on printed circuit boards and electronic devices
- Checking component and sub-assembly positions
Pattern Recognition
 |
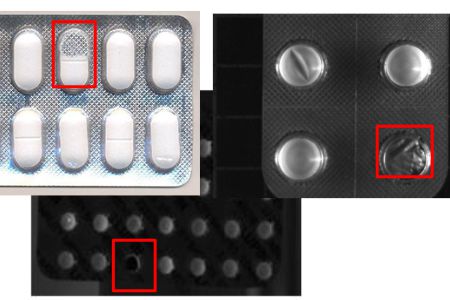 |
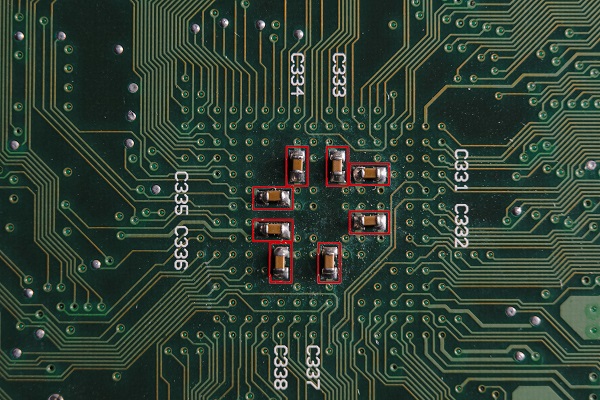
ASPAGTEQ® vision systems can recognise arbitrary patterns, shapes, features, and logos within fractions of a second, and they can compare trained features and patterns.
Machine vision pattern recognition is used to accurately find parts, verify assemblies, and precisely control robots for efficient process control.
- Powerful algorithms allow the discovery of even the most difficult parts quickly and accurately.
- Class, quality, location, and size information results available in fractions of a second.
- We give robots eyes. The latest generation of tools can enable your robots to find, pick, and position objects with high precision.
Code Reading
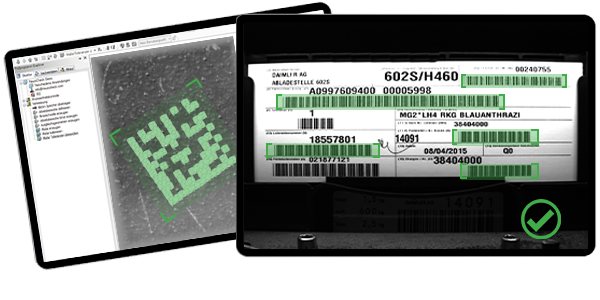
Powerful vision systems for the identification, decoding and grading of 1D and 2D codes as well as character strings, for full production line traceability.
- High speed code reading & presence
- Component track & trace
- Decoding 1D & 2D symbols, codes and characters printed on parts, labels and packages
- Verification of Direct Part Marking (DPM) codes or symbols are correct on a part or packaging
- Identifying subcomponents based on their printed code before final assembly
- Verifying the print quality of a code and returning a print quality score
- Ensuring codes are not damaged and contain the correct information
- Pallet, carton and product-level identification for logistics
Optical Character Recognition (OCR)

OCR allows the identification of scribed, stamped, printed, or pre-published textual content in all languages, fonts, sizes, and styles. Optical person Verification (OCV) is a technique of confirming that an identified individual string fits anticipated values stored to your PLC, database, or FTP server.
- Extremely fast and powerful character recognition algorithms allow you to validate text strings in a matter of seconds and not endanger your production.
- Subconsciously, the human brain may read incorrectly spelt words and misunderstand the information required to fully comprehend them; machine vision eliminates the human error factor and consistently provide accurate results.
- Tracks all text read in spreadsheets or SQL data logging for full production traceability.
Robot Control
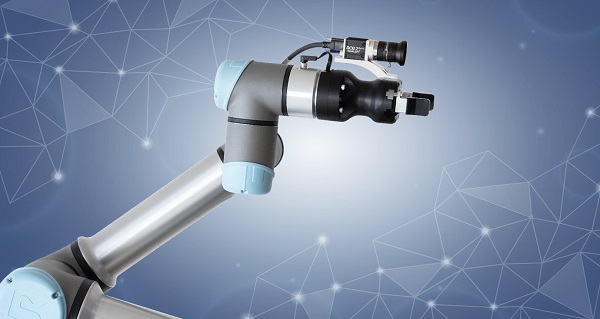
Utilising machine vision, robots can precisely identify the position of parts to guide robots, find fiducial, align products, and provide feedback on positioning adjustments. Robots can work alongside humans, optimise processes, and perform complicated and time-consuming tasks.
- Location for pick-and-place requirements
- Robot guidance
- Tracking parts on conveyors
- Bin picking
- Automatic palletising and de-palletising
- Guidance for collaborative robots
- Guidance for component assembly
- Product and large sub-assembly inspection
- Fully automated inspection tasks
Colour Matching & Verification
 |
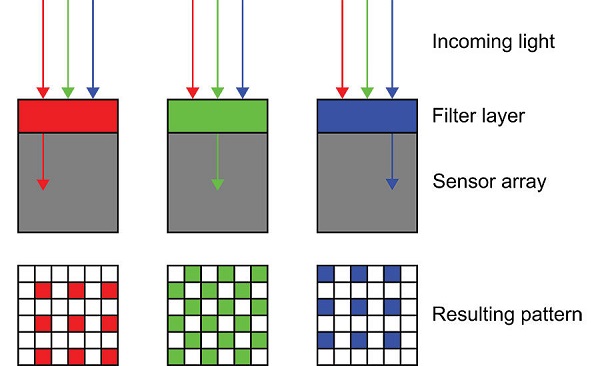 |
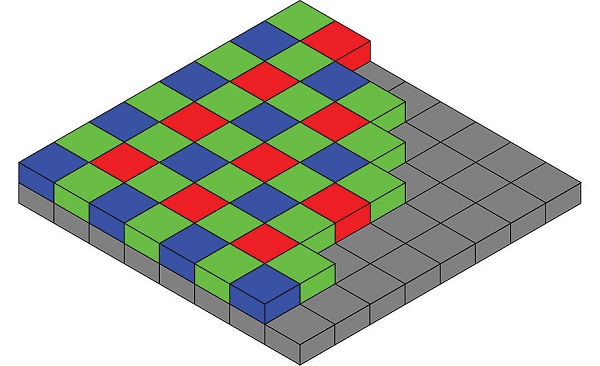
In Quality Control Applications, our powerful vision systems use colour processing to enhance image processing and precision. This includes everything from inspecting pills to inspecting blisters and checking foodstuffs.
- Inspection of foodstuffs for foreign objects
- Checking labels meet the required colour specification
- Conformance of features
- Inspection of PCB conformal coat
- Verifying beads or glue are present and meet all specifications
- Inspection of food products, organic products and parts
- Sorting of plastic components
- Verification that automotive paint finishes meet strict colour band tolerances
- Presence verification of kit system components
- Inspecting the wire colours in a wire harness
Surface Inspection
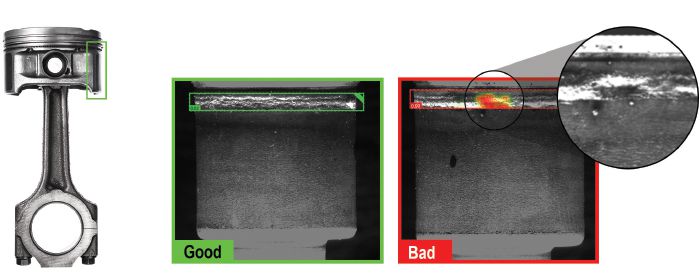
Surface inspection offers a fully automated method for identifying inclusions, foreign bodies, surface defects, cracks, fibres, and missing materials in all industries. Enhance the surface quality, improve the visual appearance, and optimise your production with the surface inspection.
- Checking for cracks, splits, inclusions, splatter and mould defects on medical moulded products
- Surface defect checks on continuous webs
- Foreign body, scratches, marks and foreign material inspection for medical devices
- Checking for chips, dents, wrinkles, punctures and tears on materials, moulds and components
- Pharmaceutical blister surface checking and pill surface quality
- Surface contamination on wound care tapes, wearable medical devices and medical adhesives
- Cosmetic inspection on medical pens, syringe bodies, medical parts and sub-assemblies
- Pin-holes and missing material on consumer product seals
- Checking visual appearance of sheet materials
- Verifying critical surface quality and imperfections on automotive, battery and electric vehicle parts
- Measuring dints, extra material and fibre defects on sheet/film products
- Stains, flaws and inclusions on medical device products
- Surface inspection of surfaces made from metal
- Pores and roughness of surfaces (topography)
- Corrugation, burrs and abrasion on parts
HAVE ANY QUESTION?
Get Started
It’s Never Too Late or Too Early to Get Started
Our solutions have helped a variety of partners raise their platform’s visibility and effectiveness. We could do the same for you.
